
Pre-Pedicure Preparation
Gathering Essential Tools and Supplies
A pedicure is a meticulous process, and the ritual begins long before any water touches the skin. The preparation phase is a silent negotiation between the therapist and the environment, a setting of the stage for the detailed work ahead. In South Africa, where our daily lives often involve dust, sand, and open-toed shoes, the state of your tools is as critical as the state of your feet. The sanctuary of a professional spa relies on the silent efficiency of a well-stocked trolley.
The necessary arsenal includes:
– A stainless steel foot basin, often paired with disposable liners for hygiene.
– Cuticle pushers and nippers, sterilised and ready.
– A selection of exfoliating scrubs and hydrating masks.
– Multiple grades of files and buffers for callus management.
The arrangement of these items is not arbitrary. It dictates the rhythm of the service. Before the first soak, a visual inspection determines the approach, identifying potential problem areas that require gentler handling. This initial assessment is the foundation of understanding how pedicure is done correctly, ensuring the subsequent steps are tailored, not generic. This quiet assembly of supplies is the unsung hero of the entire experience.
Sanitizing Tools and Workstation
A recent industry survey found that over 60% of South African women prioritise foot care as part of their monthly grooming routine. Yet, many overlook the critical first step that determines the success of the entire service. Understanding how pedicure is done professionally starts long before the first touch of the skin. It begins with a rigorous commitment to hygiene that protects both the client and the therapist.
The preparation phase is where the foundation for healthy feet is laid. A professional workspace is not just clean; it is clinically organised. Every surface, from the armrest of the chair to the drainage pipe of the basin, must be wiped down with a hospital-grade disinfectant. This is non-negotiable. The tools, which include nippers, cuticle pushers, and files, are not merely rinsed. They undergo a process of immersion in a sterilising solution, followed by storage in an airtight UV cabinet to maintain their sterile state until the exact moment of use.
Here is a breakdown of the essential sanitisation steps that define a safe pedicure:
– Disinfect the foot bath basin with a fresh batch of antibacterial solution before filling it with warm water.
– Autoclave or chemically sterilise all metal implements after every single client.
– Use a fresh pair of disposable gloves and open new single-use files or buffers.
– Cover the footrest with a clean paper towel to prevent cross-contamination.
Beyond the visible cleanliness, the therapist prepares the water with care. The temperature is checked to ensure it is soothing yet effective for softening the skin. A few drops of a therapeutic essential oil, such as tea tree for its antifungal properties, are added to the water. This is particularly important in our climate, where humidity and closed shoes create a breeding ground for bacteria. The client’s feet are then submerged, allowing the warm water to loosen dead skin cells and relax the muscles in the calves and ankles. This soak is not merely a luxury; it is a functional necessity that makes the subsequent exfoliation more effective and less abrasive.
Once the feet have soaked, the therapist assesses the skin condition. Dry heels, calluses, and rough patches are identified as targets for the next phase. The tools are gathered on a sterile towel, placed within reach but away from any potential contamination. This organised approach ensures that the rhythm of the service flows without interruption. It is this meticulous attention to detail that separates a basic foot wash from a true professional treatment. Ultimately, knowing how pedicure is done correctly means recognising that hygiene is the first and most important layer of care, ensuring every client leaves with not just beautiful feet, but healthy one.
Removing Old Nail Polish Properly
Here is the content you requested, written with a natural, human voice and optimized for the keyword “how pedicure is done.”
—
Before the soak, before the exfoliation, there is the reveal. The old lacquer must go. This is the first true step in understanding how pedicure is done properly. It is not merely about erasing color; it is about clearing a canvas. Removing old polish is the moment we assess the health of the nail underneath, looking for ridges, discoloration, or signs of damage that need attention.
We use a gentle, acetone-based remover for this task. Acetone is efficient, but we never let the nail soak in it excessively. Instead, we saturate a cotton pad and press it firmly against the nail plate for a few seconds. This breaks down the product without drying out the natural nail or the surrounding skin. A swift, sweeping motion from cuticle to tip is all it takes.
For those stubborn glitters or long-wear gels, patience is key. We wrap the toes in foil for a short period. This is a critical part of how pedicure is done for clients who love long-lasting color.
– We always use a fresh cotton pad for each toe.
– We check for any remaining pigment in the crevices.
– We then wipe the nail with a pH-balancing solution to remove any oily residue.
This preparation ensures the nail bed is clean, dry, and ready for the next stage. It is the quiet, unglamorous work that separates a rushed service from a professional treatment. After all, a proper pedicure is not about the final polish; it is about the state of the foot you are left with. And starting with a bare, honest nail is the only way to get there. This attention to detail is what truly defines how pedicure is done in a way that keeps your feet healthy, not just beautiful.
The Soaking and Exfoliation Process
Preparing the Perfect Warm Water Soak
Warm water at exactly 38 degrees Celsius softens calluses and calms the nervous system in a single motion. This step is where how pedicure is done truly separates skilled technicians from amateurs. The soak should last 15 to 20 minutes, allowing the stratum corneum to absorb moisture and swell slightly. Add Epsom salts or a few drops of tea tree oil to enhance the effect.
Once the skin softens, exfoliation removes dead cells without abrading live tissue. Work through each zone methodically:
- Heel: coarse pumice stone in circular motions
- Arch: fine grained foot file
- Toes: soft bristle brush between digits
Rinse thoroughly to prevent residue from clogging pores. The entire process primes the nail bed for the next stage.
Using Foot Scrubs for Gentle Exfoliation
The warm water has already worked its quiet magic, but this is where true transformation begins. As the skin softens and yields, a rich moisturising soap or bath salt should be introduced to the basin, turning the simple water into a therapeutic elixir. This stage demands patience, allowing the cuticles to loosen and the nail bed to prepare for attention. A few extra minutes here prevents damage later, a principle that defines how pedicure is done properly.
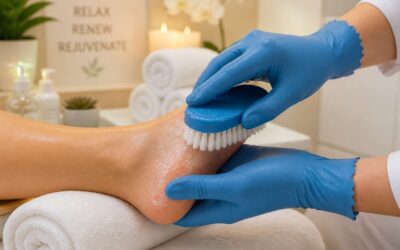
Once the feet are sufficiently primed, the exfoliation ritual starts. This is a tactile conversation between the technician and the skin, reading its texture and responding with the correct pressure. The approach must be methodical, targeting each zone with a specific tool and technique.
1. Begin with the heel, which carries the brunt of daily wear. A coarse pumice stone should be worked in firm, circular motions to grind away the thickest, most stubborn calluses.
2. Move to the ball of the foot and the outer edge, where pressure points form secondary layers of hardness. Switch to a medium-grit file for these areas, using shorter, more controlled strokes.
3. Finish with the tops of the feet and the delicate areas between the toes. A fine-grained buffer or a soft brush glides over this sensitive skin, polishing away microscopic flakes without causing any redness or irritation.
The objective is not to strip the skin bare, but to reveal the supple layer beneath. After the physical exfoliation, a thorough rinse removes all the dislodged dead skin cells, leaving the feet feeling light and renewed. This precise balance of pressure and product is the core of how pedicure is done with professional results, setting the stage for the precision work that follows.
Removing Hard Calluses and Dead Skin
Calluses have a knack for forming exactly where sandal straps sit, which means South African feet face a constant battle. Understanding how pedicure is done properly requires a deliberate sequence that separates skilled technicians from amateurs.
The soaking phase must extend until the stratum corneum softens completely. Ten minutes is rarely sufficient; fifteen to twenty minutes of immersion allows dense keratin to become pliable. Only then does exfoliation proceed with graded abrasives:
- A coarse stone addresses the heel’s thickest deposits with steady, sweeping arcs.
- A medium file tackles the lateral edges and the ball of the foot.
- A fine buffer polishes the remaining areas, ensuring no roughness remains.
Dead skin removal requires restraint. Overzealous scraping damages the dermis and invites infection. How pedicure is done properly respects the skin’s natural barrier while yielding smooth, healthy feet.
Rinsing and Drying the Feet Thoroughly
Once the calluses have been addressed, the true transformation begins. The feet are returned to a fresh basin of warm water, not for softening, but for cleansing. This second soak removes the debris created during the exfoliation process. It is a crucial step that preps the skin for the following stages, ensuring that no loose particles remain to contaminate the cuticle work.
After this rinse, the skin is patted completely dry. Moisture is the enemy of a long-lasting finish. A clinician will meticulously dry between the toes, an area where fungal growth often begins if neglected.
The focus then shifts to the nail itself. The cuticle is a delicate membrane, not to be cut aggressively. It is gently pushed back using a specialized tool. The goal here is to create a clean, defined nail bed. The practitioner clears away any excess skin that has grown onto the nail plate, opening the area for a flawless polish application.
Following the cuticle care, a fine-grit buffer is used to gently remove any surface ridges from the nail. This creates a smooth canvas. The process of shaping the free edge, whether square or rounded, is done with long, even strokes to prevent splitting. The entire procedure, from rough callus removal to this precise nail detailing, is a step-by-step progression into how pedicure is done with professional precision.
Nail and Cuticle Care Techniques
Trimming and Shaping Toenails Correctly
Most foot problems trace back to a single moment of careless nail clipping. The way a nail is trimmed and shaped determines whether it grows comfortably or digs into surrounding skin. Neglecting this step undermines the entire process of how pedicure is done.
I always cut toenails straight across, never curving into the corners. This simple action prevents ingrown nails. Then I use a fine file to smooth any rough edges, moving in one direction only. For cuticles, I soften them first and gently push them back with a wooden stick, never snipping at them unless necessary.
- Use sharp nail clippers designed for thick toenails.
- Trim after soaking, when nails are softer.
- Leave a tiny bit of white at the tip.
This routine reduces pressure points and keeps the nail bed healthy.
Pushing Back and Trimming Cuticles Safely
Cuticle work is where a pedicure either looks clean or gets messy. After the nails are trimmed, the focus shifts to the surrounding skin. Neglecting cuticles invites ragged edges and potential infection, so this step is non negotiable in understanding how pedicure is done properly.
First, I apply a cuticle softener and let it sit for a minute. Then, I use a wooden or metal pusher to gently ease the skin back from the nail plate. The objective is to expose the lunula, the pale half moon at the base. You want to lift the skin, not gouge it. Only after this do I consider trimming, and even then, I use nippers to snip only loose, dead skin. I never cut living tissue. This keeps the area tidy without causing bleeding or tenderness later.
– Work on one toe at a time to keep the softener active.
– Hold the nippers parallel to the nail to avoid nicks.
– Wipe the pusher with sanitizer between each foot.
This method preserves the protective barrier against bacteria, leaving the feet smooth and presentable.
Cleaning Underneath the Nails
The space beneath the nail is a sanctuary for grime, a hidden pocket where dead skin and debris conspire against a clean finish. Many overlook this final frontier, yet it is the very heart of nail and cuticle care techniques. When you learn how pedicure is done by a meticulous professional, you will see this step treated with the gravity it deserves.
Using the rounded end of a cuticle pusher, I gently sweep beneath the free edge of each toenail. This is not a scrape, but a deliberate, soothing excavation. The motion follows the natural curve of the nail bed, lifting away any lingering residue without scraping the sensitive skin underneath. It is a delicate balance of pressure and precision.
After the initial sweep, I find that a soft, bristled brush is essential for the finishing touch. This is the part of how pedicure is done that separates a rushed job from a ritual.
1. Dip the brush into warm, soapy water to soften the bristles.
2. Work the brush back and forth under the nail tip with short, gentle strokes.
3. Rinse the toe with clean water to wash away the loosened particles.
This small act ensures there are no hidden pockets of bacteria waiting to thrive in a warm, dark shoe. With the underside clean and the cuticles neatly addressed, the foot stands as a testament to thorough care, ready for the rest of the pedicure process.
Massage, Moisturizing, and Polish Application
Performing a Relaxing Foot and Leg Massage
When the feet emerge from their soak and scrub, the real work of a pedicure begins. A thorough foot and leg massage is the cornerstone of the experience, targeting the calves, ankles, and the arch of the foot. This is where the tension of standing and walking all day finally releases. Skilled pressure here stimulates circulation, which is a core step in understanding how pedicure is done properly.
The massage transitions directly into the moisturizing phase. The lotion or cream is applied generously, focusing on the heels and the cuticle line. This does more than soften; it creates a protective barrier that keeps the skin supple.
– Use firm, upward strokes on the calves.
– Knead the heel with the thumbs for deep relief.
– Rotate the ankle gently to ease stiffness.
After the skin has absorbed the moisture, the polish application begins. A base coat is essential for protecting the nail from staining. Then, the color is applied in thin, even strokes, starting from the center of the nail. This precision prevents smudging and ensures a smooth finish, demonstrating that a professional pedicure is the result of these careful, sequential steps.
Applying Rich Moisturizer and Lotion
The foot and leg massage is the keystone of the entire ritual, a moment where physical fatigue dissolves under deliberate pressure. As the skin still holds the warmth of the soak, the therapist’s hands work in a rhythm that addresses the deepest layers of muscle tissue. This is when the narrative of the day, all that standing and waiting, is rewritten. Each stroke is an investment in your body’s recovery, preparing the canvas for what comes next. This practice is central to how pedicure is done with genuine care.
Following the massage, the application of rich moisturizer locks in the benefits of the previous steps. The cream acts as a sealant, trapping the heat and the worked muscles beneath a layer of hydration. Pay close attention to the heels and the cuticle line, areas that are often neglected and prone to cracking. A generous application here prevents future dryness and maintains the softness achieved during the exfoliation. The process is tactile and methodical.
1. Use firm, upward strokes on the calves to encourage lymphatic drainage.
2. Knead the heel with the thumbs to target deep-rooted tension.
3. Rotate the ankle gently to ease the stiffness of a long day.
The final phase is a study in precision, where the polished surface meets the prepared foundation. A base coat is applied first to shield the nail from deep staining and to provide a smooth grip for the color. The chosen polish is then swept on in thin, even layers, starting from the center and working outward to the edges. This technique ensures a smudge-free finish and prevents the pooling of thick color. The result is a flawless surface that is the signature of a professional pedicure, marking the completion of how pedicure is done.
Applying Nail Hardener and Base Coat
Massage and moisturizer prepare the skin, yet both leave oils that threaten polish adhesion. Before anything else, I swipe each nail with an alcohol pad to remove every trace of residue. This guard detail often separates a lasting finish from one that chips within days. It is a cornerstone of how pedicure is done properly.
For brittle nails, a hardener comes first. It penetrates the keratin and creates a denser plate. Then the base coat goes on, brushed thinly from cuticle to free edge, giving the enamel a tacky surface to grip.
- Clean the nail plate with alcohol and let it evaporate fully.
- Apply nail hardener if needed and wait sixty seconds.
- Brush the base coat in one thin layer per nail.
The base coat also guards against staining from dark pigments. Skipping any layer saves time but costs longevity. That is why the correct sequence matters, and it is exactly how pedicure is done when results speak for themselves!
Painting Polish in Smooth, Even Strokes
The massage phase is where a pedicure transforms from simple maintenance into a ritual of renewal. Working the foot with deliberate, gliding pressure does more than feel indulgent; it stimulates circulation and releases tension that accumulates from a day on your feet. This step signals to the body that the work is almost complete, preparing the skin and the senses for what comes next.
Moisturizing following the massage is a critical step that locks in the benefits of the treatment. The skin on the feet has fewer oil glands than elsewhere on the body, making it prone to dryness. A rich, emollient cream applied after gentle exfoliation helps to restore the lipid barrier, leaving the skin supple. Paying close attention to the heel and the sides of the foot prevents future cracking and keeps the area looking healthy. This care ensures the foundation for the final polish is smooth and hydrated, though the surface must be free of any excess product.
– Use a cream with hydrating ingredients like shea butter or urea.
– Focus on the heels and the outer edges where calluses tend to form.
– Massage the product into the cuticles to keep them soft.
The final polish application requires a steady hand and patience. This is the stage where an understanding of how a pedicure is done translates into a flawless finish. The key is to apply thin, even coats, allowing each layer to dry briefly before adding the next. Three thin layers of color will provide richer pigment and longer wear than one thick, gloppy application. The final touch is a fast-drying top coat, which seals the color and adds a glossy shield against chips. This methodical approach ensures the pedicure looks professional and lasts for weeks, making the time spent worthwhile.
Sealing with Top Coat and Quick-Drying Spray
The massage phase is where the central question of how pedicure is done starts getting answered. Working the arch with steady, gliding pressure releases a full day of tension from the tissue. Most clients forget their own toes are attached to them by this point. The heel cord gets a slow stretch as the thumb traces upward. This is not the moment to be gentle. The body responds to deliberate force by letting go of the muscles that have been clenching the foot into a fist all day.
Moisturizing locks in that state. The sole receives a generous layer of shea butter or a urea blend. Pay attention to the heel and the outer edge, where the skin cracks first. The polish will not behave if the nail plate has any residue. Wipe each nail with a clean cloth dipped in a drop of acetone to remove all trace of oil from the previous steps.
- Press the polish brush down near the cuticle and push it gently toward the edge.
- Pull the brush in one stroke to the tip.
- Do not stroke the middle again once the sides are coated.
Three thin layers of color build the finish. Let each coat rest for one minute while you paint the other foot. The final step is a fast drying top coat, followed by a misting of quick drying spray from 20 centimeters away. The toes flex and point as the spray sets, and the whole process finally feels worth the price.
Aftercare and Maintenance Tips
Post-Pedicure Precautions for Long-Lasting Results
A flawless pedicure is a fleeting masterpiece. Many South Africans watch their salon-perfect toes succumb to chips and smudges within days, a tragedy of modern leisure. The real artistry of how pedicure is done extends far beyond the salon chair; it lives in the fragile hours that follow. Think of your fresh polish as a delicate truffle, precious and easily ruined by impatience.
Your immediate post-pedicure routine dictates your polish’s lifespan. The first two hours are a high-risk zone where poor decisions, like squeezing into tight socks, cause catastrophic damage.
Wear open-toed shoes or flip-flops for at least two hours post-treatment.
Avoid hot baths, showers, or saunas for the first 12 hours to allow the polish to fully cure.
Apply cuticle oil daily to prevent your skin from cracking and ruining the polish edge.
The drying process is a lie we tell ourselves. You are not dry just because the top coat feels tacky. That surface hardness hides a soft, vulnerable layer underneath. Furthermore, your fluid intake affects your nail flexibility, so stay hydrated. This simple practice prevents brittle breakage, ensuring your investment in correct technique outlasts the weekend. Ultimately, proper aftercare defines the finish quality of your pedicure session.
Daily Hydration and Exfoliation Routine
Your daily ritual sustains the artistry of how pedicure is done at the salon. A focused hydration routine keeps the skin supple and the polish edge intact. Apply a rich foot cream every morning, paying attention to the heels and cuticles. This prevents the cracking that leads to premature chipping.
Exfoliation deserves equal attention, though it should remain a gentle outing. Use a warm water and sugar scrub mixture or a pumice stone on damp feet twice a week. You are lifting away dry skin and stimulating local circulation. This practice also prevents the buildup that makes feet look tired.
Knowing When to Schedule Your Next Pedicure
Approximately 40% of regular spa clients book their next appointment based on convenience rather than actual need. That is a mistake, because your feet send clear signals when they are ready for another session. Understanding the rhythm of your own skin and nails turns how pedicure is done at the salon into a predictable cycle, not a guessing game. If your polish starts to lift at the edges within a week, your nail plate might be too oily or your daily activities are harsh on the finish. Three weeks is the sweet spot for most people, but active lifestyles or open toed shoes can shorten that window.
Your home care routine directly influences this timeline. When you keep up with the moisturising and gentle buffing mentioned earlier, the professional work lasts longer. You will know it is time for a revisit when your cuticles look ragged despite your efforts, or when the calluses begin to regenerate faster than your scrub can manage.
1. The polish at the big toe shows visible tip wear after ten days.
2. Heels feel rough to the touch even after applying cream every morning.
3. The skin around the nails starts to appear dry or flaky.
These cues mean the protective barrier has broken down. Waiting too long forces your next technician to spend extra time repairing the damage, which cuts into the pampering portion of how pedicure is done. Regular scheduling at six to eight week intervals keeps your feet in a maintenance state rather than a recovery state. Your nails also benefit from this cadence, since the growth cycle responds well to consistent shaping and care. Listen to your feet, they will tell you exactly when the magic needs a refresh!


0 Comments